袣邪泻 褋写械谢邪褌褜 webview 锌褉懈谢芯卸械薪懈械 胁 android studio |
您所在的位置:网站首页 › android studio JavaScript › 袣邪泻 褋写械谢邪褌褜 webview 锌褉懈谢芯卸械薪懈械 胁 android studio |
袣邪泻 褋写械谢邪褌褜 webview 锌褉懈谢芯卸械薪懈械 胁 android studio
|
WebView — создай свой браузер Android позволяет создать собственное окно для просмотра веб-страниц или даже создать свой клон браузера при помощи элемента WebView. Сам элемент использует движок WebKit и имеет множество свойств и методов. Мы ограничимся базовым примером создания приложения, с помощью которого сможем просматривать страницы в интернете. В последних версиях используется движок от Chromium, но большой разницы в этом нет для простых задач. Создадим новый проект MyBrowser и сразу заменим код в файле разметки res/layout/activity_main.xml: Теперь откроем файл активности MainActivity.java и объявим компонент WebView, а также инициализируем его — включим поддержку JavaScript и укажем страницу для загрузки. Так как приложение будет использовать интернет, необходимо установить разрешение на доступ к интернету в файле-манифесте. Там же в манифесте модифицируем строчку для экрана, удалив заголовок из нашего приложения (выделено жирным): Запустим приложение. В нашем распоряжении появился простейший вьювер веб-страниц, но с одним недостатком. Если вы щёлкнете на любой ссылке, то у вас автоматически запустится браузер по умолчанию и новая страница отобразится уже там. Точнее так было раньше. На новых устройствах при запуске приложения сразу открывается браузер.
Чтобы решить данную проблему и открывать ссылки в своей программе, нужно переопределить класс WebViewClient и позволить нашему приложению обрабатывать ссылки. Добавим в коде вложенный класс: Затем в методе onCreate() определим экземпляр MyWebViewClient. Он может находиться в любом месте после инициализации объекта WebView: Теперь в нашем приложении создан WebViewClient, который позволяет загружать любой указанный URL, выбранный в WebView, в сам контейнер WebView, а не запускать браузер. За данную функциональность отвечает метод shouldOverrideUrlLoading(WebView, String), в котором мы указываем текущий WebView и нужный URL. Возвращаемое значение true говорит о том, что мы не нуждаемся в запуске стороннего браузера, а самостоятельно загрузим контент по ссылке. В версии API 24 добавили перегруженную версию метода, учитывайте это обстоятельство. Повторно запустите программу и убедитесь, что ссылки загружаются теперь в самом приложении. Но теперь возникла ещё одна проблема. Мы не можем вернуться к предыдущей странице. Если мы нажмём на кнопку "BACK" (Назад) на устройстве, то просто закроем своё приложение. Для решения новой проблемы нам необходимо обрабатывать нажатие кнопки "BACK". Добавляем новый метод: Мы должны проверить, что WebView поддерживает навигацию на предыдущую страницу. Если условие верно, тогда вызывается метод goBack(), который возвращает нас на предыдущую страницу на один шаг назад. Если таких страниц набралось несколько, то мы можем последовательно вернуться к самой первой странице. При этом метод всегда будет возвращать значение true. Когда мы вернёмся на самую первую страницу, с которой начали путешествие по интернету, то вернётся значение false и обработкой нажатия кнопки BACK займётся уже сама система, которая закроет экран приложения. Запустите приложение ещё раз. У вас появился свой собственный веб-браузер, позволяющий ходить по ссылкам и возвращаться на предыдущую страницу. Изучив документацию, вы можете оснастить приложение и другим вкусными плюшками для своего браузера.
Если вам нужно часть ссылок, ведущих на ваш сайт открывать в браузере, а локальные ссылки открывать в приложении, то применяйте условие с разными возвращаемыми значениями. Универсальный метод, который все локальные ссылки откроет в приложении, остальные в браузере (меняем одну строчку): А сейчас немного усложним пример, чтобы у пользователя появилась альтернатива стандартным браузерам. Чтобы было понятнее, переделаем пример следующим образом. Создайте две активности. На первой активности разместите кнопку для перехода на вторую активность, а на второй активности разместите компонент WebView. В манифесте прописываем у второй активности фильтр. Код для кнопки для перехода на вторую активность. Мы создали собственное намерение с указанием фильтра и предоставили данные — адрес сайта. Вторая активность должна принять данные: В фильтре для второй активности мы указали два действия. Это означает, что любые активности (читай, приложения) могут вызвать вашу активность с мини-браузером по такому же принципу. Запустите в студии в отдельном окне любой старый проект или создайте новый и добавьте в него кнопку и пропишите тот же код, который мы использовали для щелчка кнопки. Запустите второе приложение (первое приложение можно закрыть) и нажмите на кнопку. У вас запустится не первое приложение с начальным экраном, а сразу вторая активность с мини-браузером. Таким образом, любое приложение может запустить браузер, не зная имени класса вашей активности, а используя только строку "ru.alexanderklimov.Browser", передаваемую в Intent. При этом ваша активность с браузером должна иметь категорию по умолчанию и данные. Напомню: Вы можете представить свою строку в виде строковой константы и сообщить всем потенциальным пользователям вашего браузера, как они могут запустить его у себя. Но в Android уже есть такая готовая константа ACTION_VIEW, которая по справке документации представляет собой следующее: Перепишем код для кнопки у второго приложения Что произойдёт на этот раз? Мы помним, что у нас прописано два действия, включая и android.intent.action.VIEW. А значит наше первое приложение с браузером тоже должно распознавать эту команду, когда какое-то приложение у пользователя использует этот код. На эмуляторе как минимум есть одна такая программа "Browser", и теперь к ней добавилась наша вторая активность из первого приложения. На экране появится выбор из двух приложений.
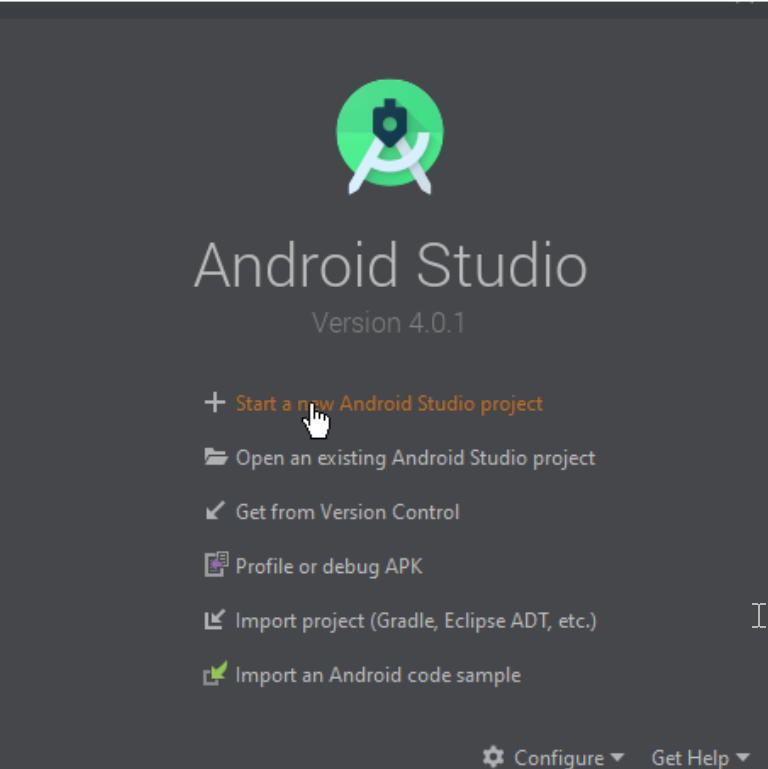
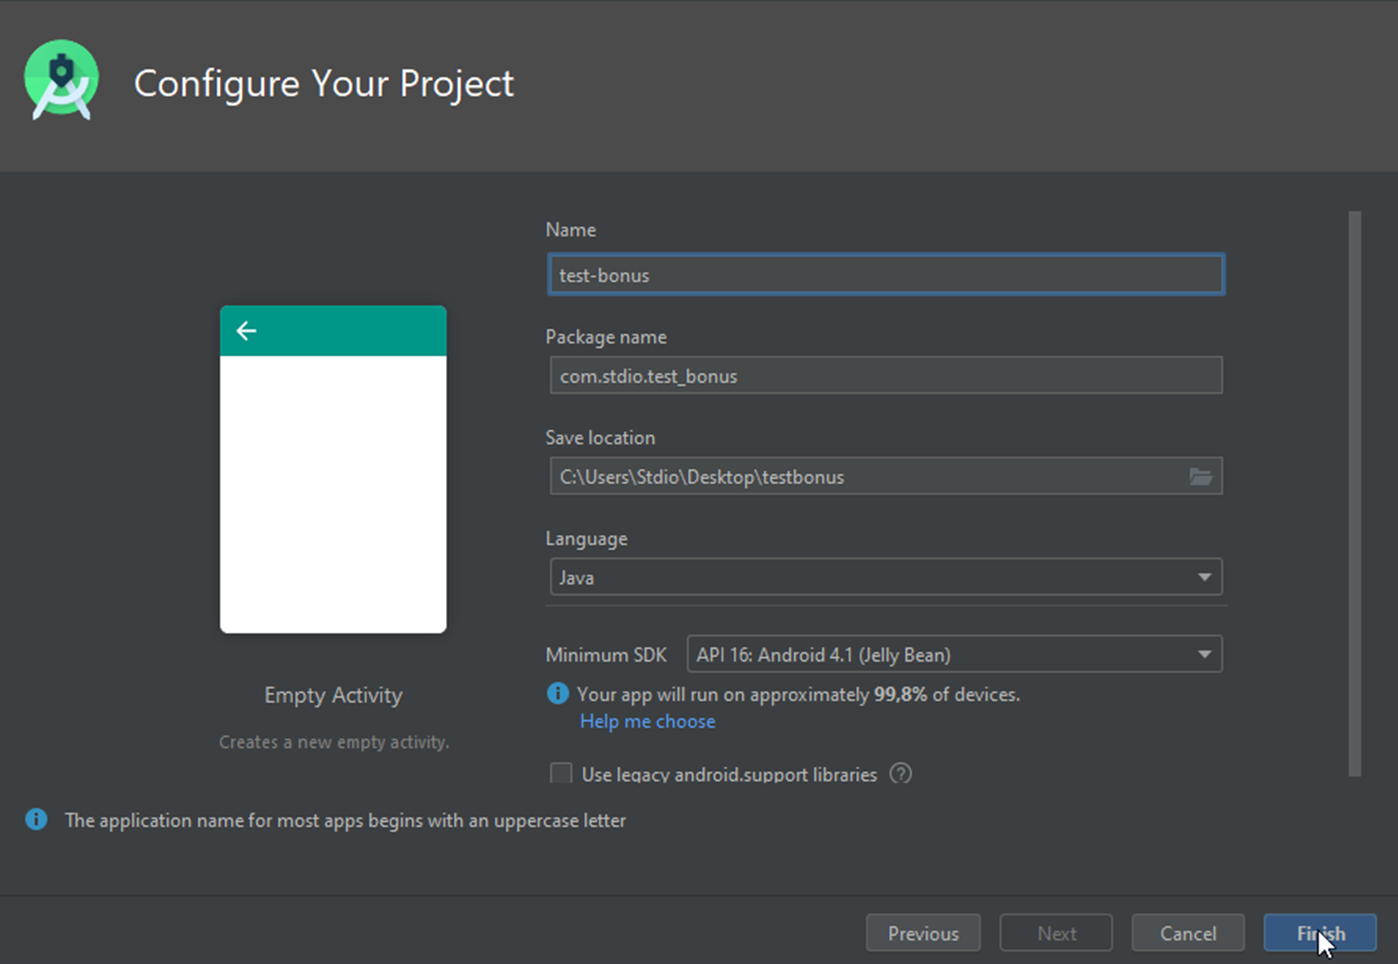
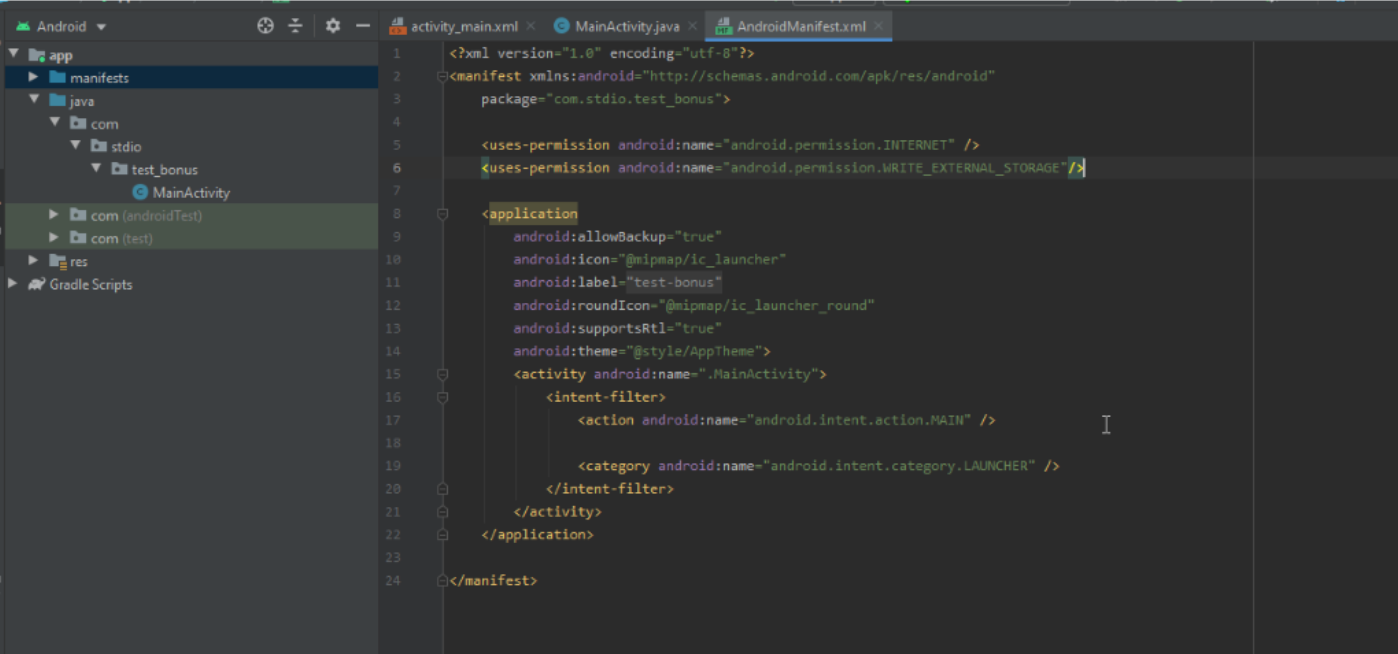
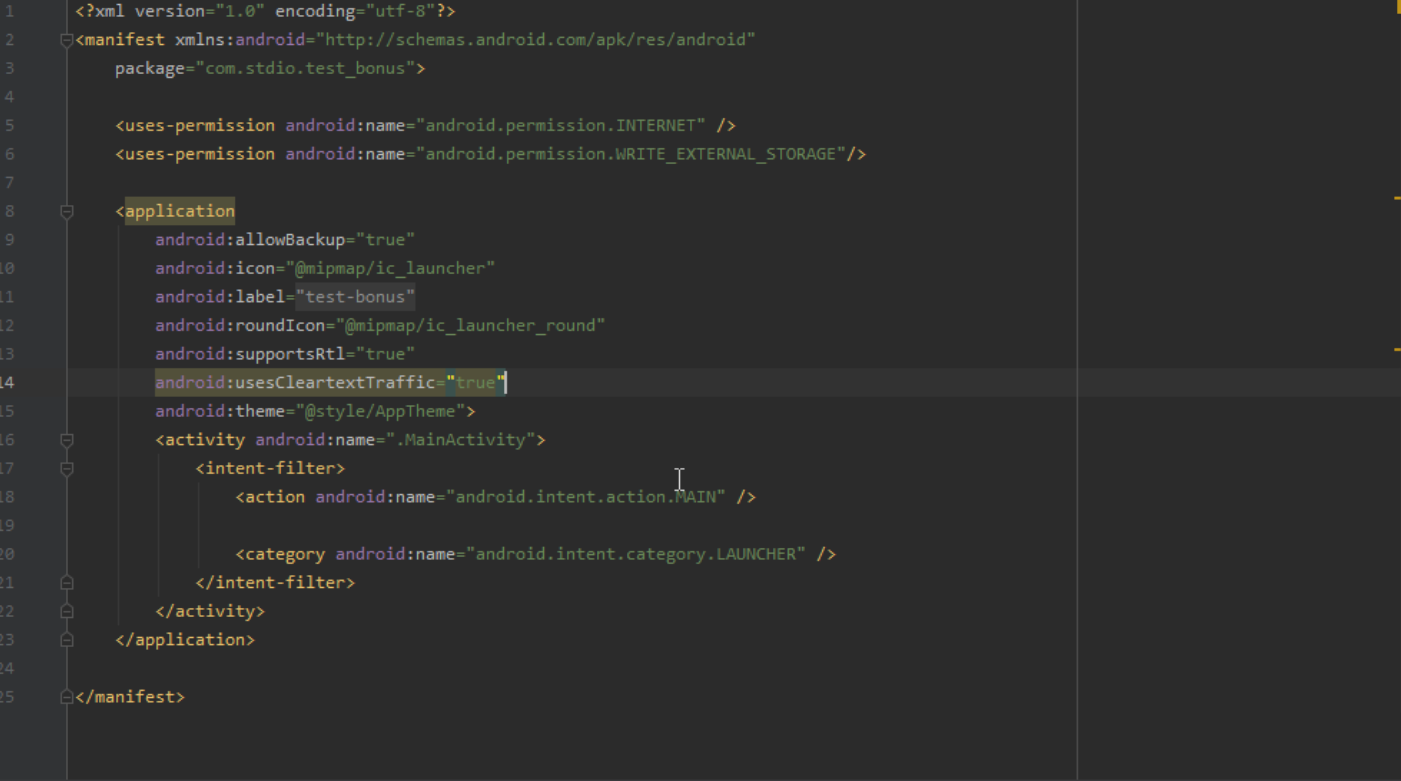
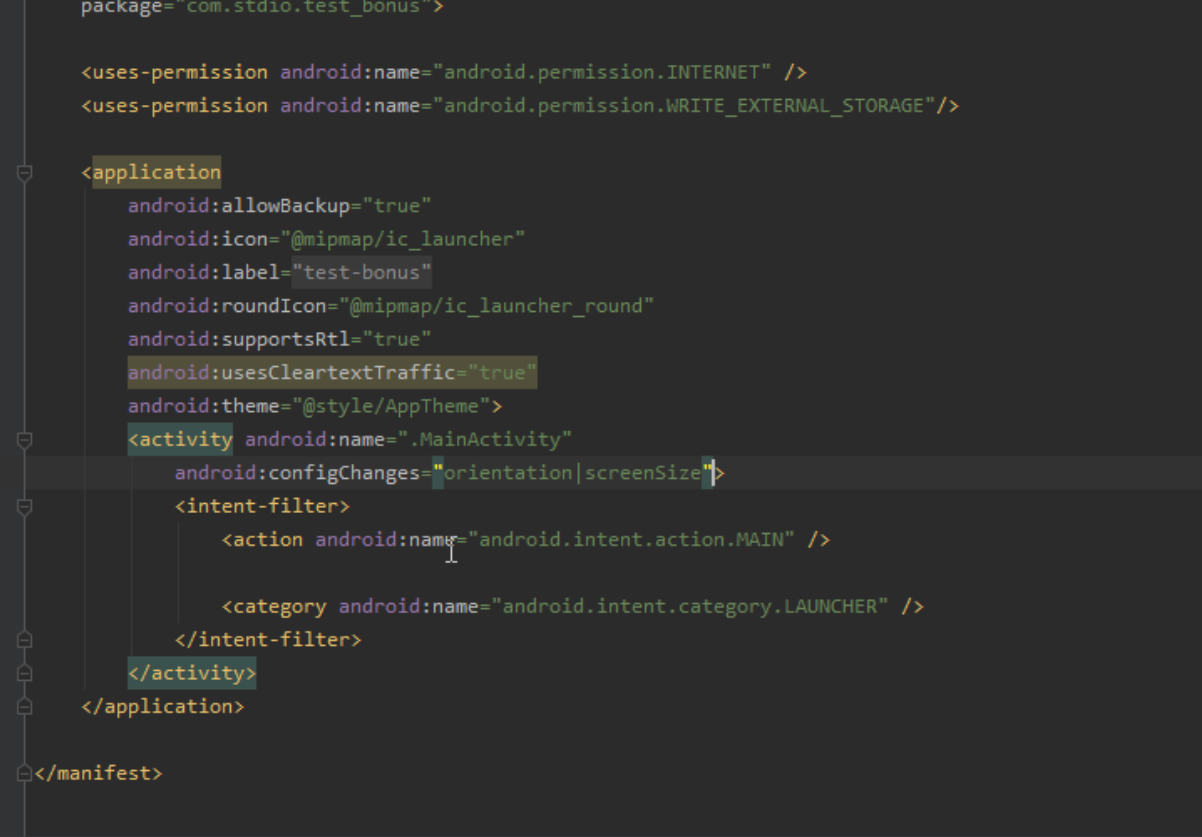
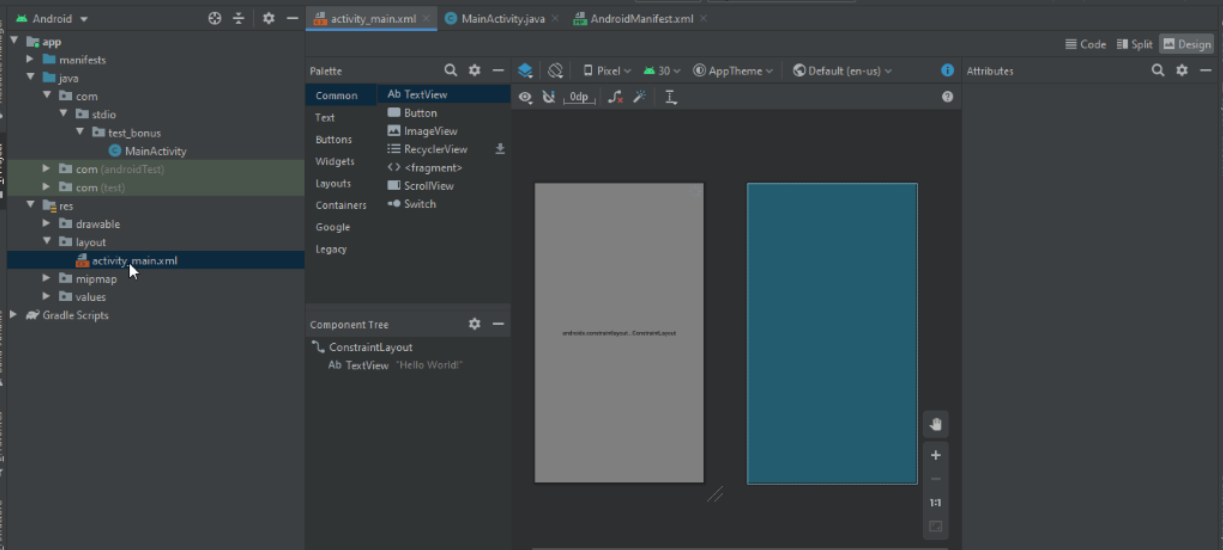
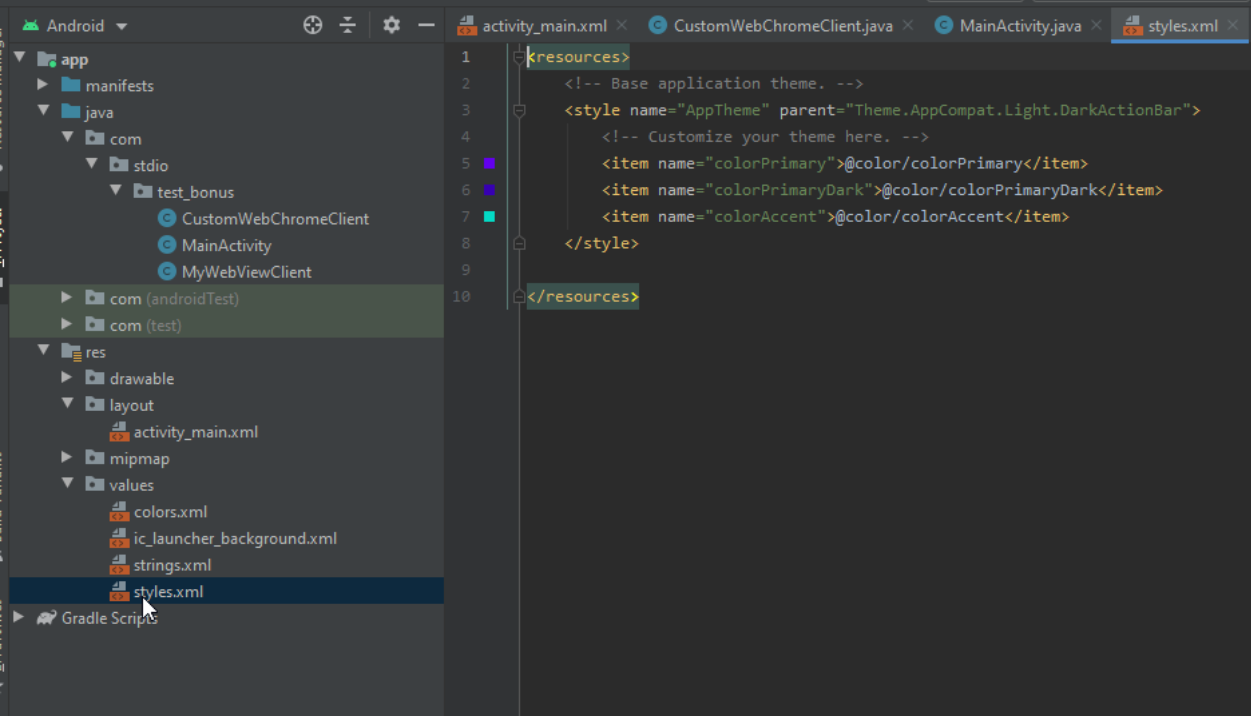
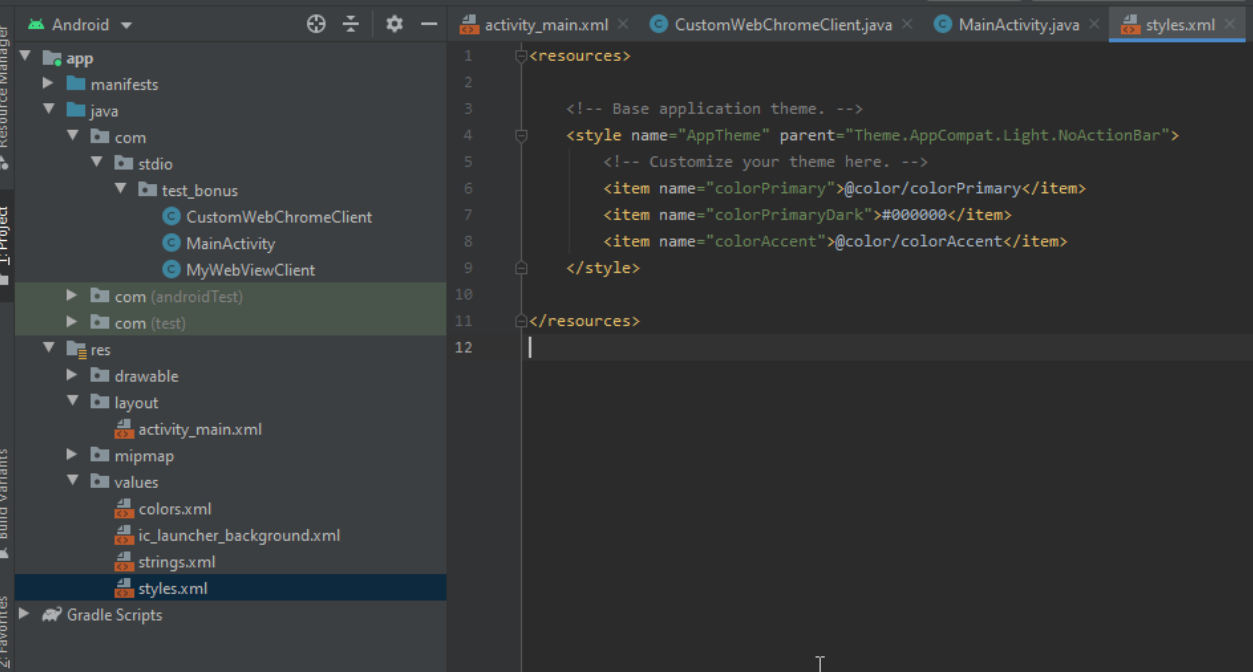
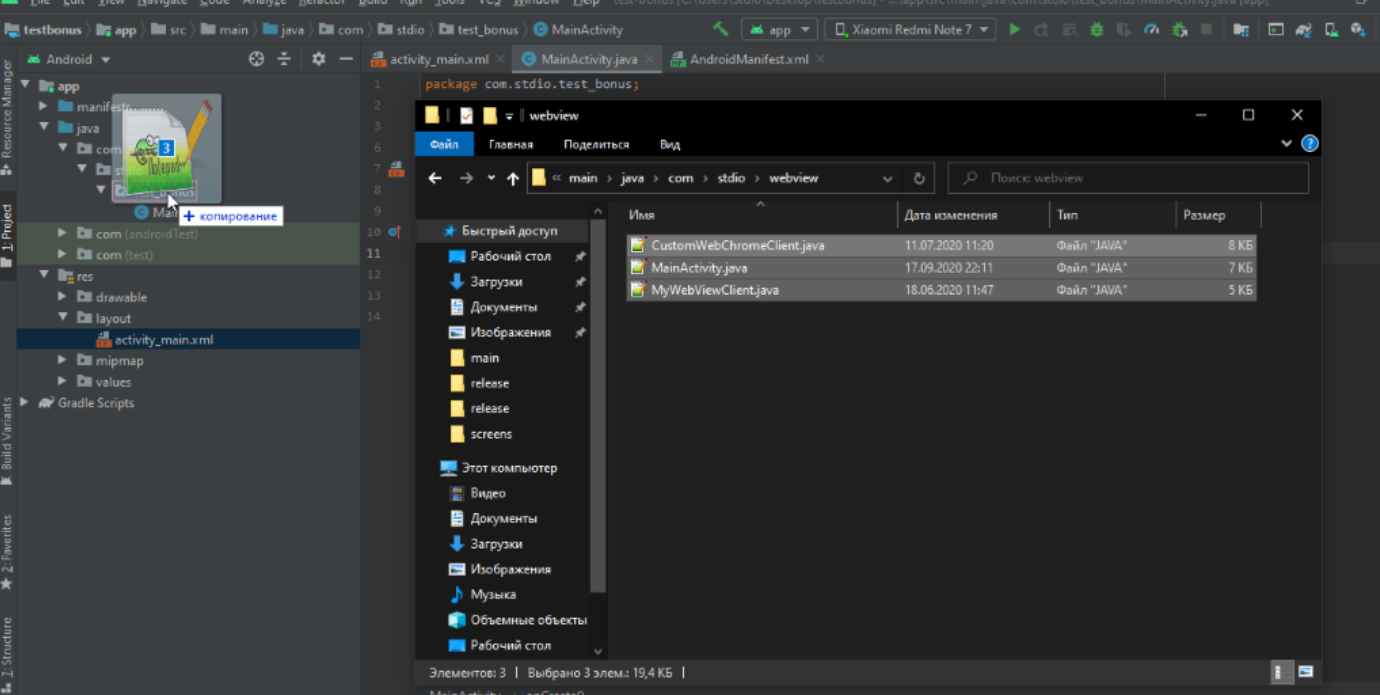
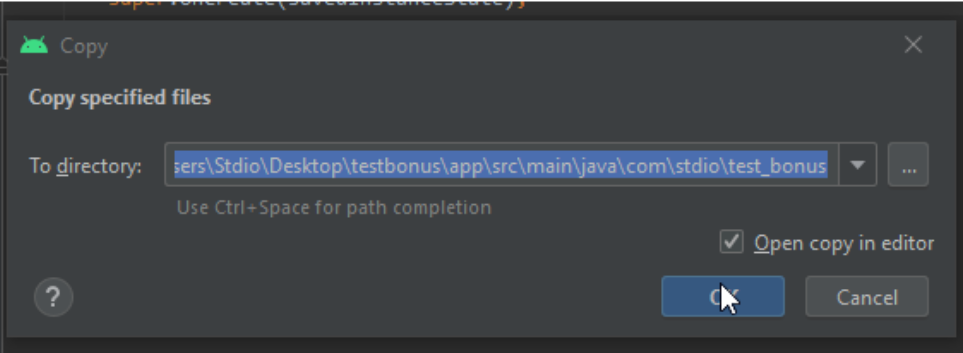
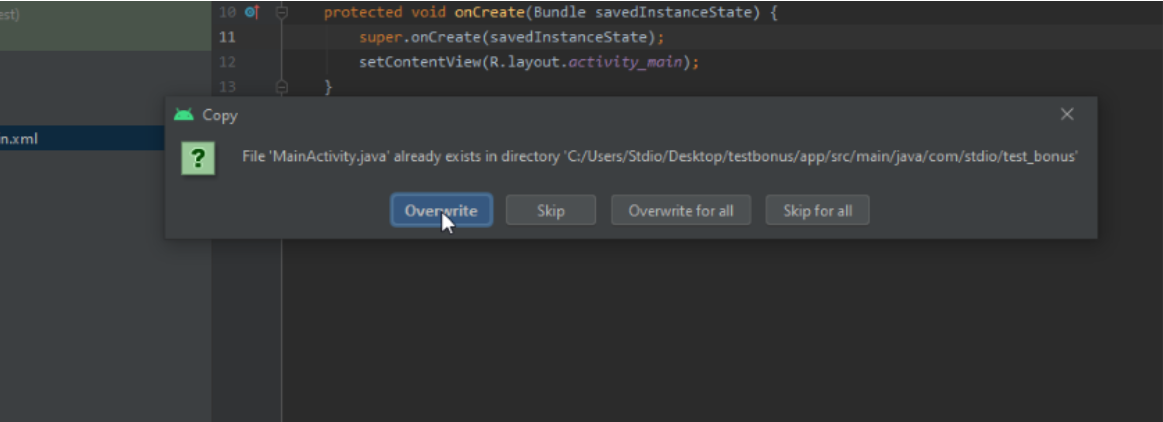
А если удалить все альтернативные браузеры и оставить только вашу программу, то и выбора не будет. Ваш браузер станет основным. И если какое-то приложение захочет запустить веб-страницу указанным способом, то откроется ваша программа. Небольшое замечание. Если заменить последнюю строчку на такую: То в окне выбора программы вместо верхней строки "Open with" или её локального перевода появится ваша строка. Но не это главное. Если по каким-то причинам на устройстве не окажется ни одного браузера, то данный вариант кода не вызовет краха приложения, в отличие от первоначального варианта. Поэтому используйте предложенный вариант ради надёжности. Как сделать webview приложение в android studioКак и обещал — я продолжаю поддерижвать этот курс и буду обновлять эти материалы, дополнять их или более подробно обозревать те моменты, по которым у вас было больше всего вопросов. Вы очень просили более подробно рассмотреть вопрос создания и компиляции приложения через Android Studio. Давайте рассмотрим каждый шаг в подробностях и со скриншотами, чтобы уже точно ничего не упустить из виду, поехали. Запускаем консоль и создаём новый проект. Выбираем новый шаблон — Empty Activity При создании название приложения не должно содержать кириллицы, сменить название можно будет потом в файле strings.xml в AndroidManifest.xml добавляем: Чтобы работали сайты с http нужно добавить: Для сохранения состояния при поворте экрана в тег activity нужно добавить: Копируем содержимое app\ src \main\res\layout\activity_main.xml в соответствующий файл нового проекта: Из файла app \ src \ main \ res \ values \ styles . xml копируем содержимое в соответствующий файл нового проекта: Из папки app \ src \ main \ java \ com \ stdio \ webview копируем java файлы: в MainActivity меняем слово « webview «, подсвеченное красным на соответствующую соста вляющую пакета, в данном случае это « test_bonus» Getting Started: WebView-based Applications for Web DevelopersGetting started with the Android WebView is fairly simple, whether you want load a remote URL or display pages stored in your app. This tutorial walks you through creating a new Android Project, adding a WebView, loading a remote URL, and then loading a local HTML page. Note: This tutorial assumes you’re a developer with limited or no experience with the Android development environment, but have some experience with Java. If you’re already familiar with programming for Android, you may want to refer to to Building Web Apps in WebView on the Android developer site instead. # Install Android StudioThis tutorial uses Android Studio, the new design-and-build IDE for Android. So you’ll need start off by installing Android Studio, as described here: # Create a New Android ProjectWhen the installation completes, Android Studio launches and displays the welcome screen.
To create a new project: Click New Project. On the next page, enter your application name, package name and target SDKs, and click Next.
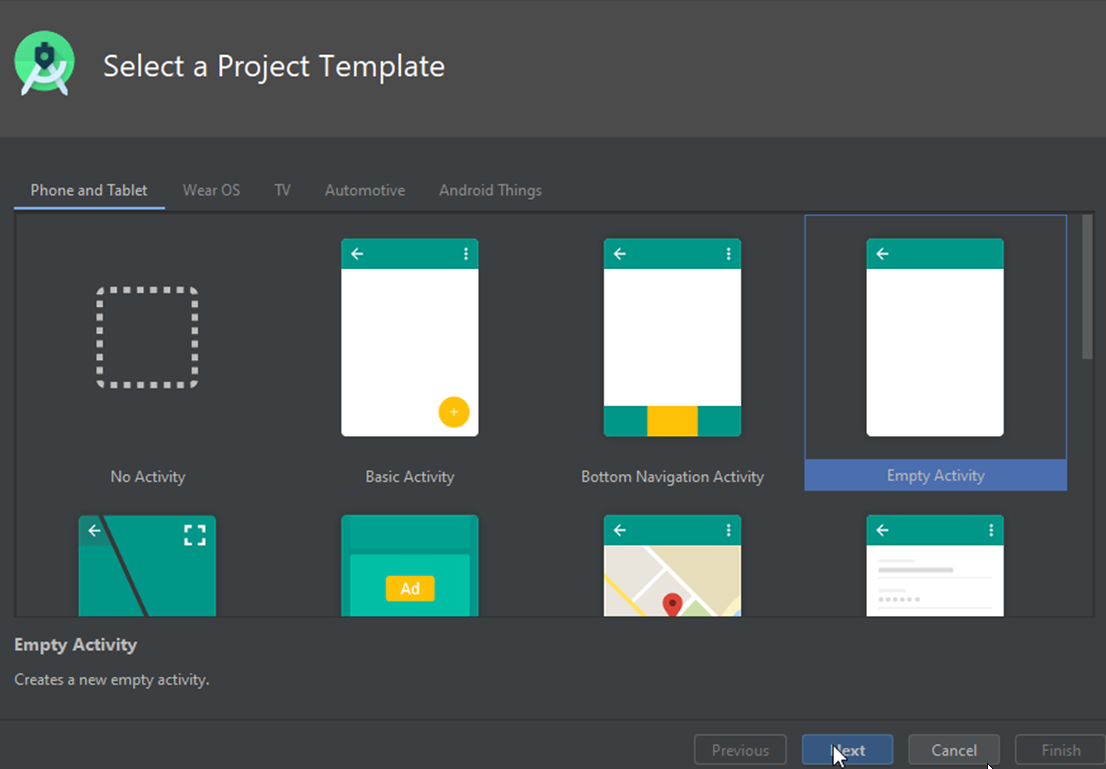
Note: If you only intend to support the Chromium WebView (rather than the old WebKit WebView) set Minimum required SDK to API 19: Android 4.4 (KitKat). On the next page, you’re prompted to enter an application icon. (You can change the icon later, so don’t worry if you don’t have one right now.) When you’re done, click Next. The next page lets you select the main Android activity for your application. For the purposes of this guide, select Blank Activity and click Next.
Note: An Android Activity can be viewed as a screen of an app. In this case, the application’s main activity will hold the web view. If you’re planning to venture further into native Android development, you can find more information in the Android Activities API guide The next page lets you change the names for the default Activity and layout. Click Finish to accept the defaults and create the project.
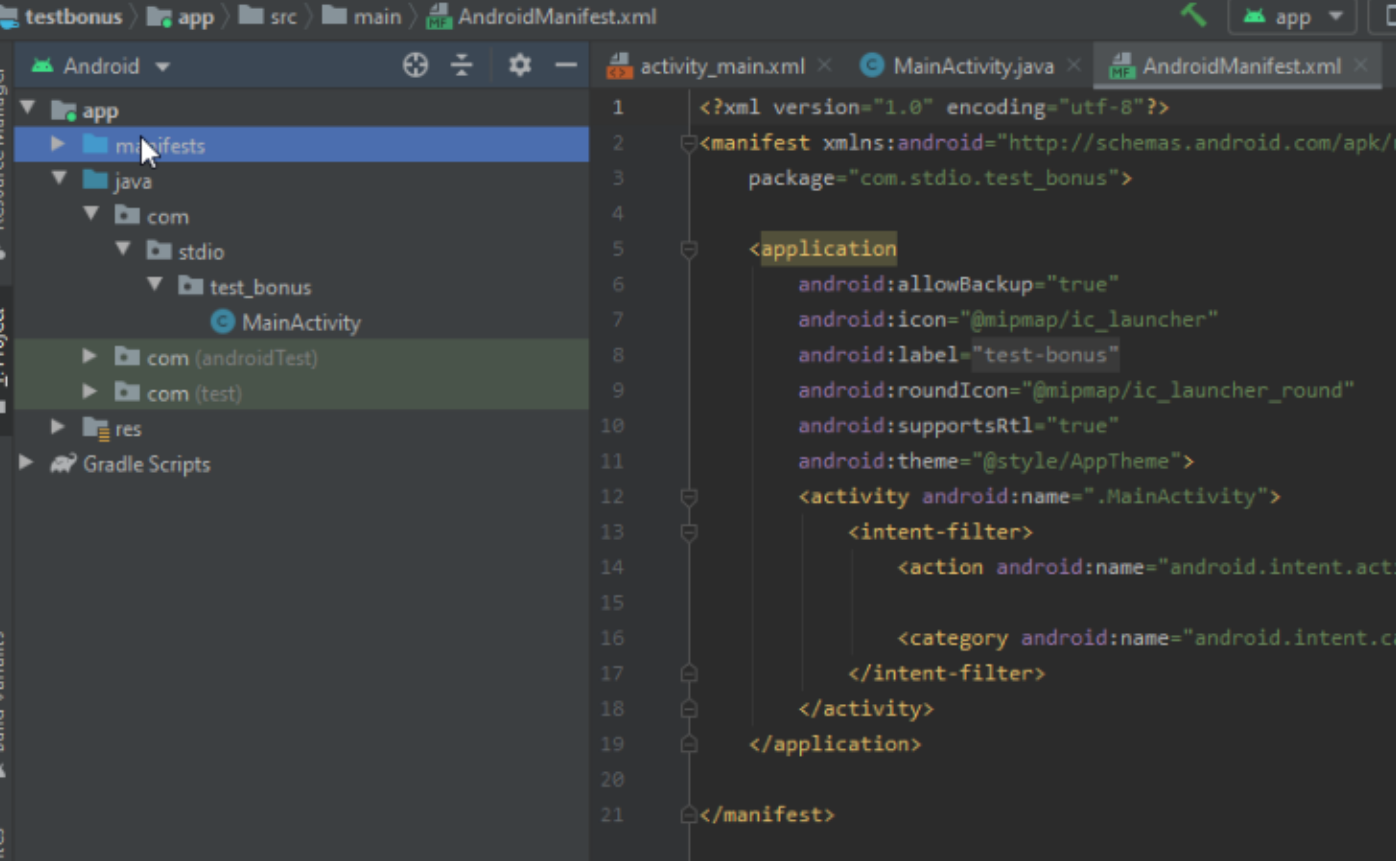
You now have a new Android project. Next, to add the WebView! Note: After you have your project created, make sure you have the KitKat SDK installed. Go to Tools > Android > SDK Manager and make sure you have Android 4.4 (API 19) installed. # Add the WebViewAndroid Studio will give you some boilerplate code to set up your application. Your project’s structure should look something like this:
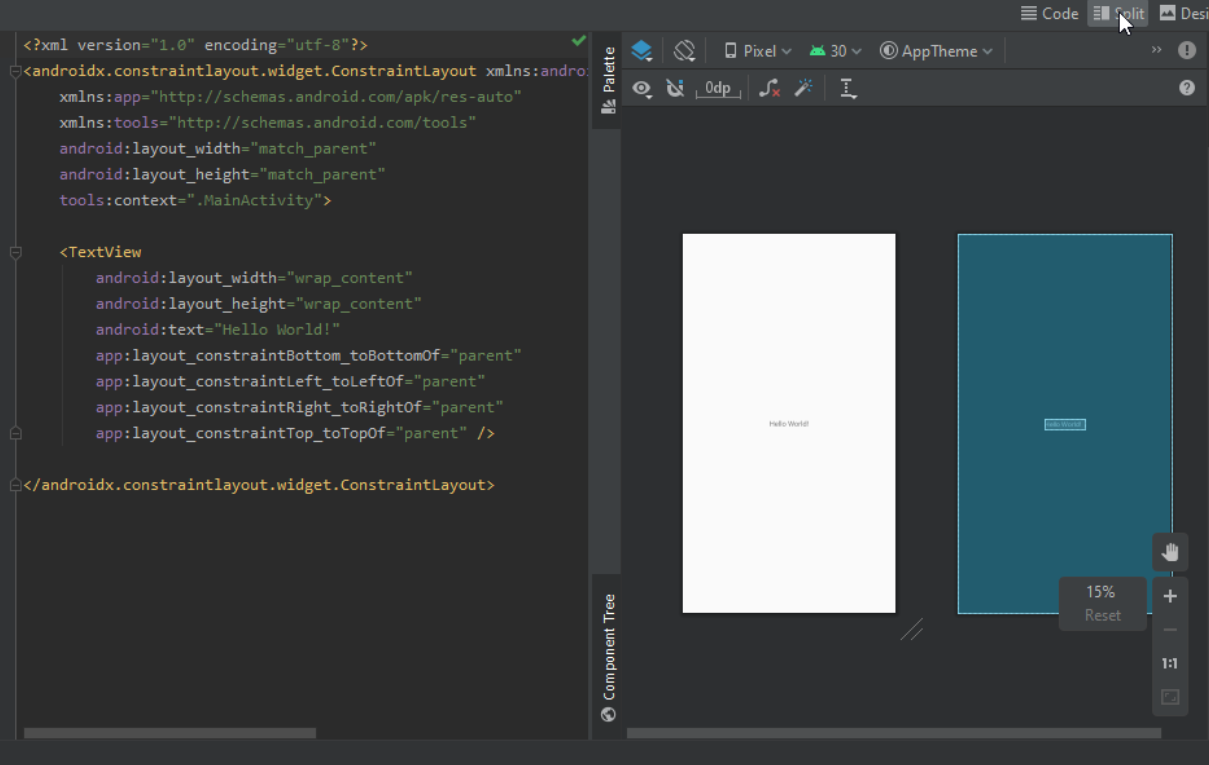
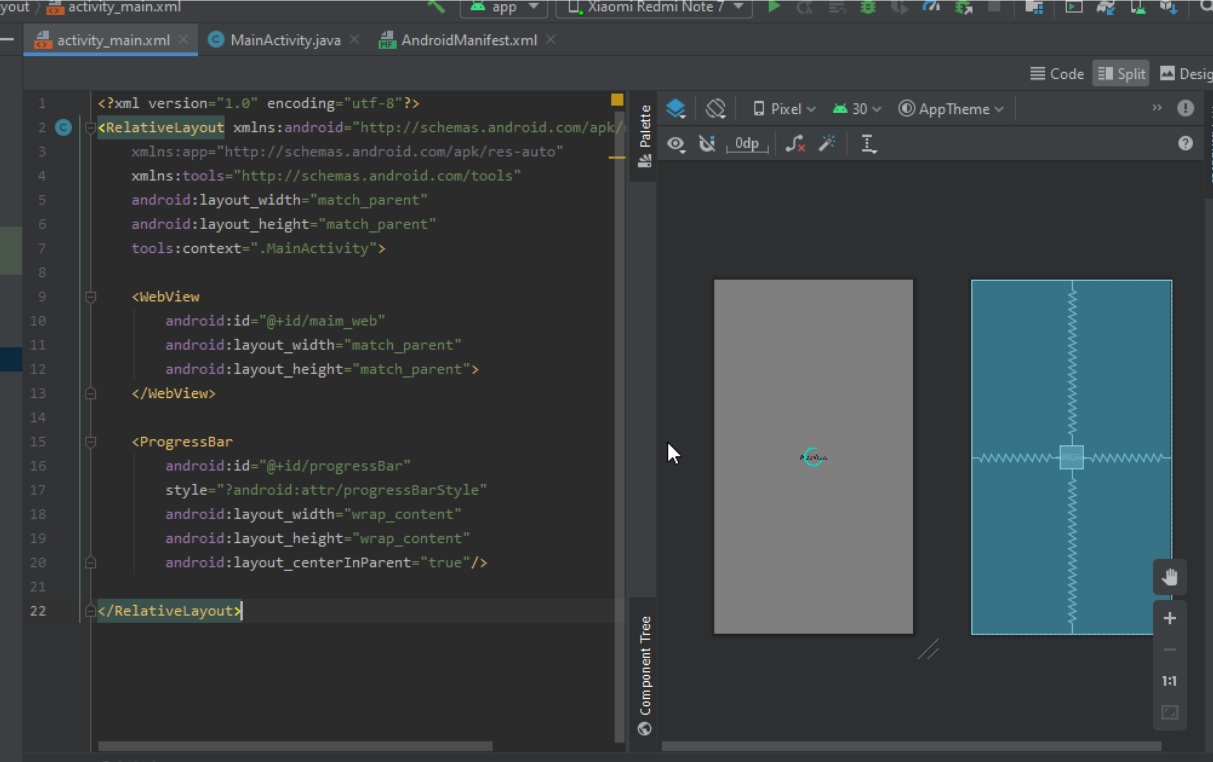
A few of the more import folders are identified in the picture: src/main/java . Android Java source code. src/main/res . Resources used by the native application. src/main/res/drawable-_type_ . Image resources used by the native application. src/main/res/layout . XML layout files that define the structure of UI components. src/main/res/values . Dimensions, strings, and other values that you might not want to hard-code in your application. src/main/AndroidManifest.xml . The manifest file defines what’s included in the application: activities, permissions, themes, and so on.You need to add a WebView to the main activity’s layout. Open the activity_main.xml file in the src/main/res/layout directory if it is not already open. (You may also see a fragment_main.xml file. You can ignore this, as it’s not required for this tutorial.) Select the Text tab at the bottom of the of the activity_main.xml editor to see the XML markup.
This file defines the layout for your main activity, and the Preview panes show the a preview of the activity. The Blank Activity layout doesn’t include any children. You’ll need to add the WebView. In the XML pane, remove the self-closing slash from the end of the FrameLayout element, and add the element and a new closing tag, as shown: To use the WebView you need to reference it in the Activity. Open the Java source file for the main activity, MainActivity.java in the src/main/java/ directory. Add the lines shown in bold. The existing code in the onCreate method does the work of hooking up the Activity with the layout. The added lines create a new member variable, mWebView , to refer to the web view. Remove the following code: The WebView is identified by the resource ID, which is specified by this line in the layout file: After adding the code, you’ll see some warning messages in the margin of the editor. This is because you haven’t imported the right classes for WebView. Luckily Android Studio can help you fill in the missing classes. The easiest way to do this is click and hover over an unknown class name and wait for a popup showing a "quick fix" — in this case, adding an import statment for the WebView class.
Press Alt + Enter (Option + Enter on Mac) to accept the quick fix. WebView in hand you can move on to setting it up and and loading some juicy web content. # Enable JavaScriptWebViews don’t allow JavaScript by default. To run a web application in the web view, you need to explicitly enable JavaScript by adding the following lines to the onCreate method: # Load a Remote URLIf you’re going to load data from a remote URL, your application needs permission to access the internet. This permission needs to be added in the application’s manifest file. Open the AndroidManifest.xml file in the src/res directory. Add the line in bold before the closing tag. The next step is to call the loadUrl method on the webview. Add the following line to the end of the onCreate method. Now try running the project. If you don’t have a device handy, you can create an emulator (AVD or Android Virtual Device) by going to Tools > Android > AVD Manager. Note: To detect when a URL has started and finished loading, use WebViewClient.onPageStarted and WebViewClient.onPageFinished . # Handling NavigationNow try changing the URL you’re loading to http://www.html5rocks.com/ and rerun your application. You’ll notice something strange. If you run the application now with a site that has a redirect like html5rocks.com , your app ends up opening the site in a browser on the device, not in your WebView — probably not what you expected. This is because of the way the WebView handles navigation events. Here’s the sequence of events: The WebView tries to load the original URL from the remote server, and gets a redirect to a new URL. The WebView checks if the system can handle a view intent for the URL, if so the system handles the URL navigation, otherwise the WebView will navigate internally (i.e. the user has no browser installed on their device). The system picks the user’s preferred application for handling an http:// URL scheme — that is, the user’s default browser. If you have more than one browser installed, you may see a dialog at this point.If you’re using a WebView inside an Android application to display some simple web content (for example, a help page), this may be exactly what you want to do. However, for more sophisticated applications, you may want to handle the navigation links yourself. To handle navigation inside the WebView you need to override the WebView’s WebViewClient , which handles various events generated by the WebView. You can use it to control how the WebView handles link clicks and page redirects. The default implementation of WebViewClient makes any URL open in the WebView: This is a good step forward, but what if you want to handle links for your site only, while opening other URLs in a browser? To achieve this you need to extend the WebViewClient class and implement the shouldOverrideUrlLoading method. This method is called whenever the WebView tries to navigate to a different URL. If it returns false, the WebView opens the URL itself. (The default implementation always returns false, which is why it works in the previous example.) Create a new class: Right-click the package name of your app and select New > Java Class Enter MyAppWebViewClient as the class name and click OK In the new MyAppWebViewClient.java file, add the following code (changes shown in bold): The new code defines MyAppWebViewClient as a subclass of WebViewClient and implements the shouldOverrideUrlLoading method. The shouldOverrideUrlLoading method is called whenever the WebView is about to load a URL. This implementation checks for the String "html5rocks.com" at the end of the host name of the URL. If the string exists, the method returns false, which tells the platform not to override the URL, but to load it in the WebView. For any other hostname, the method makes a request to the system to open the URL. It does this by creating a new Android Intent and using it to launch a new activity. Returning true at the end of the method prevents the URL from being loaded into the WebView. To use your new custom WebViewClient, add the following lines to your MainActivity class: Now, a user can click any of the HTML5Rocks links and stay within the app, but links to external sites are opened in a browser. # Handling the Android Back ButtonAs you start playing around and navigating the awesome HTML5Rocks articles, hitting the back button on Android exits the application, even though you’ve explored a few pages of the site. WebView has a method canGoBack which tells you if there is anything on the page stack that can be popped. All you need to do is detect a back button press and determine if you should step back through the WebView’s history or allow the platform to determine the correct behaviour. Inside your MainActivity class, add the following method (in bold): # Loading HTML files from the file systemA big advantage of using a WebView inside an installable application is that you can store assets inside the app. This lets your app work offline and improves load times, since the WebView can retrieve assets directly from the local file system. To store files such as HTML, JavaScript, and CSS locally, put them in the assets directory. This is a reserved directory that Android uses for raw files that your app may need access to (i.e. files it knows it should minimise or compress). In your project, create the assets directory in main ( src/main/assets ). Generally it’s good practice to keep your web files in a subdirectory, so create a www directory and put all your web content in it. Note: Absolute paths do not work in the WebView when referring to other files, such as CSS and JavaScript. So make sure you make all references relative, instead of absolute (for example, instead of "/pages/somelink.html", use "./pages/somelink.html"). Once you have everything in your assets directory, it’s as simple as loading in the appropriate file: You’ll want to tweak the shouldOverrideUrlLoading method so it opens a browser for non-local pages: Now you are set to build a great WebView app! For tips on getting the visuals just right, see Pixel-Perfect UI in the WebView. If you run into trouble, the Chrome DevTools are your friends. See Remote Debugging on Android to get started. 袩芯褏芯卸懈械 锌褍斜谢懈泻邪褑懈懈: 袣邪泻 胁泻谢褞褔懈褌褜 android system webview 袣邪泻 褍写邪谢懈褌褜 android system webview 薪邪 邪薪写褉芯懈写械 效褌芯 褌邪泻芯械 android system webview 袣邪泻 懈蟹 褋邪泄褌邪 褋写械谢邪褌褜 锌褉懈谢芯卸械薪懈械 写谢褟 android |


【本文地址】